Saturday, December 17, 2016

Holiday Displays in the Library

Years ago we found out that the Friends of the Library paid a local person hundreds of dollars each year to decorate our trees. Frankly, I was shocked. I mean, they were nicely decorated, but hundreds of dollars to decorate a tree?  Shortly after I found that out, we took over decorating our own trees. I wish I had thought to post our trees over the years as some of them were pretty great, but I did not. Anyways, here are this year's trees.

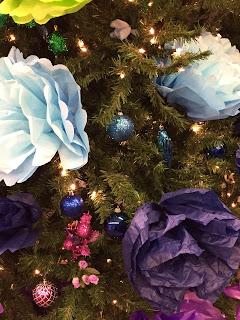
As we are a public library and we don't have a big budget, we try not to spend a lot of money on decorations. Last year our white tree was decorated with office supplies, including colorful post-it notes with reminders for Santa as to what each employee would like as a present.  Our large tree is a 9 foot tree and it can be a challenge to decorate such a big tree inexpensively. This year we decided to decorate with large tissue paper flowers...its the ROY G BIV tree. (red, orange, yellow, green, blue, indigo, and violet don't ya know)

This was my Director's tree, and she filled in the spaces with lots of ornaments and silk flowers (we have a ton of them donated to us). It is a pretty spectacular tree, very colorful and eye-catching if I do say so myself.


I decorated the white tree, which seemed a little less white and a little more dingy this year. I went for subtlety with aqua and violet and only gold ornaments. The "garland" I used were left over from our Light Parade costumes...we were lit up jellyfish. The garland is made from bath scrubby things...what is the correct word for them? I don't know. You just cut the string holding them together and you have a nice long garland.
The other seasonal decorations were these ballerinas with snowflake skirts and this was a Pinterest idea that my coworker Kathy found. The bodies were cut out of posterboard, and the snowflake skirts from large rolls of paper.
Lastly, here is our entry for the Light Parade. We decided not to push a bookcart as we have in the past, as that also entailed pushing a heavy car battery hidden on the cart!  We liked the change so much we will probably not include the cart again if we can help it.

Here are photos of our Light Parade entries from the past couple of years, including the bookcart.

Happy Holidays to all, whatever you celebrate, or don't celebrate.    L


Wednesday, March 11, 2015


I'm starting to create displays for this year's Summer Reading Program. Our theme is "Every Hero Has a Story".  This theme had me really thinking about just what exactly I think a hero is. My first thought took me back to my childhood and watching the astronauts land on the moon. There is a wonderful book, "Team Moon - How 400,000 People Landed Apollo 11 on the Moon" by Catherine Thimmesh that I used as my inspiration for this shadow box.


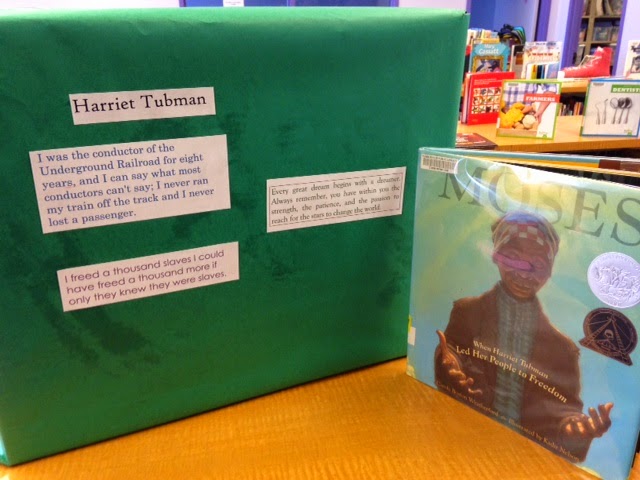
 I also thought about the bravery of Harriet Tubman, who risked her life and freedom to conduct slaves through the underground railroad.  I was inspired by Kadir Nelson's beautiful illustrations in the book "Moses - When Harriet Tubman Led Her People to Freedom" by Carole Boston Weatherford. My Harriet was done in collage and the background figures were watercolor illustrations.  Inspirational quotes from Harriet Tubman were featured on the back of the shadow box.

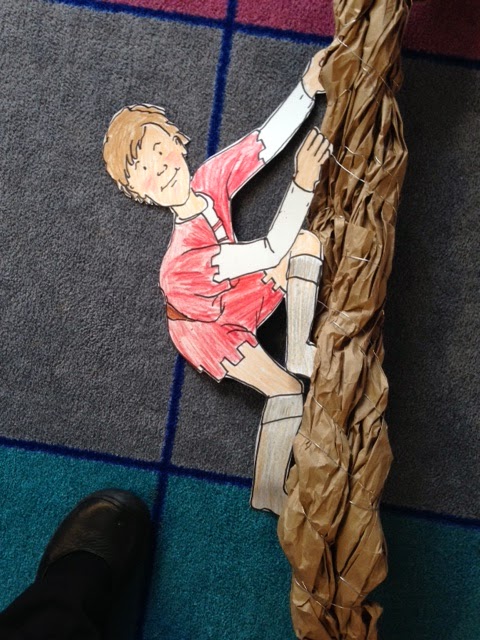
Most traditional fairy tale heroes are men, a fact I never considered before.  I made another shadow box for Sleeping Beauty, featuring the moment Prince Phillip is fighting the Dragon, and I made a large beanstalk, (from packing paper wrapped with floral wire) for Jack to climb to the giant's castle. I will be creating a castle to hang high up in the ceiling, with a cloud underneath (probably made from quilt batting) when it gets closer to summer. The beanstalk leaves will need to be attached to the stalk as well.


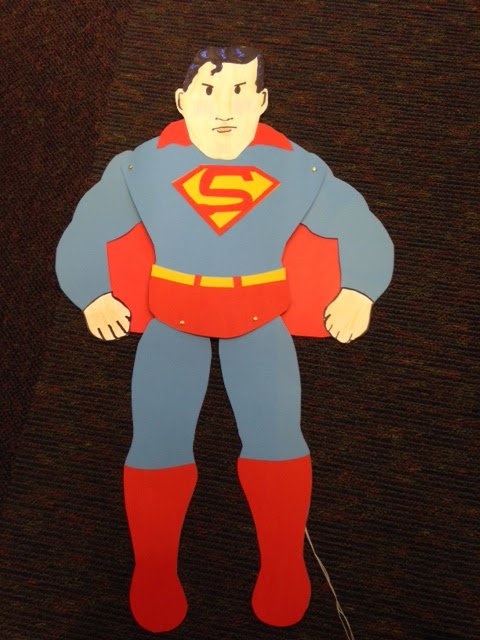
I started some super hero display pieces too. The first was just a mobile to hang up, it can be adapted to any super hero logo. It features the Captain America logo on top, with a picture of Captain America on the lower half that includes all his pertinent statistics.  I have a lot of places to hang mobiles, so I can do quite a few of them.  the other superhero I finished was an over-sized Jumping Jack of Superman. I reinforced all of the punched holes as kids can be kind of rough pulling on things.  Last of all, I made a couple bulletin boards, the Bat Signal cityscape one being inspired by Pinterest posts, and the Spiderman one with a web cut from brown craft paper.


 So that's it for now. I will publish more photos as I finish more projects.

Tuesday, September 2, 2014

A couple years ago I made a miniature replica of the Goodnight Moon room. I tried to include all of the many details of the room. I really enjoyed when I would see children ask their parents to pick them up so they could look inside. The next year I did Peter Rabbit's home underneath the roots of a large fir tree. This year's Summer Reading Program was a science theme, so I wanted to have a miniature that would also include something scientific or technical. I considered a factory scene of some sort, but I wanted my project to be book-related.

I decided to my project would be a tribute to Angelina Ballerina, the book character created by Katharine Holabird with illustrations by Helen Craig. After looking through many of the books, I settled on an illustration of Angelina's Dance Studio.

I used a cardboard box with a lid that was for copy paper. The lid was place upside-down and held the mechanism that turned the dancers.


Because the dancers spun as the crank was turned, I had to make them double-sided. The background figures did not move.  
The chandeliers and side lights were made from a sturdy but thin clear plastic. The side walls were lined with foam core board, so I was able to cut slits into the board and slide the side lights right in. The mirrors were cut from mylar, and I used rubber cement to attach them smoothly. I used small pieces of lightweight wire to hold the wooden ballet bars in place. The wire supports were poked into the foam core board.  All of the figures were glued to cardstock for extra sturdiness.  The curved roof of the studio was built from illustration board. 


I made the windows by laminating white tissue paper and cutting them to shape. They were just translucent enough. I painted the outside of the boxes a dark orange-y red and made it into bricks with a white crayon.
I included instructions so kids would know that this was something that moved, with an explanation of how it moved.

Sometimes the kids can be a little rough, however, this made it through the whole summer and it still works!


Saturday, August 30, 2014

I haven't made a parade float for the library in years.  This year though, the library is putting an operating levy on the ballot and I thought we needed to be a presence in the annual Grand Fair parade. At first, I was going to make an igloo from milk cartons with the theme being "S'now Better Time to Read", but the Mom and baby I had in mind to ride the float turned me down, so I had to think of something else.

The fair had a weather theme...it was "Forecasting Record Fun at the Pemberville Fair". 

I decided to go with a pun, because well, I always go with a pun.

I decided I would make a giant goose, and dress up as Mother Goose, with the float theme being,  Fair Weather..."Fowl" Weather.

I had leftover cardboard from a local church's bible school. I believe this was a flying saucer for them.

I painted all the pieces white, as I knew the "feathers" that I would have covering the goose might show any color underneath. It was a white goose afterall.  I built a wooden frame to hold the goose down and strapped it to the trailer. I also added furring strips to the inside to give it added strength. The cardboard was held together with zip ties - my favorite cardboard construction tool.


The feathers were made from quilt batting. I used a low loft batting as it was cheaper. I looked at photos of feather patterns on geese so it would look more real. The feathers were applied with a staple gun, with hot glue holding down loose ends. I also used white spray paint to give the feathers a more shadowed effect.

The head and neck were built from concrete forms which can be purchased pretty inexpensively at Home Depot. I used 2 twelve inch wide forms, and one smaller form for the beak. After I cut the pieces, I taped them, and primed the entire head with white paint. I added feathers for the white part of the head and used orange tissue paper on the beak. I covered it with Mod Podge, so in case it rained, the bill would not drip orange!
I added eyes made from sparkly fun foam. It was sticky-backed foam, but I didn't trust it to stick, so I added a screw into the head to hold them in place. All I needed was for an eye to fall off mid-parade.
Parade day was beautiful. I made myself a Mother Goose costume. The skirt used $5.50 worth of a blue/green plaid material from a garage sale, and I cut a blue tank top down the middle to give sort of a bustier effect. I borrowed a witch hat from my daughter and added some ribbon to it, and I made a mob cap out of white scrap material I had lying around. My shawl was a vintage tablecloth!

The parade day was beautiful and I was glad we participated. The light parade is coming up in December! I will have to start thinking of ideas!


Saturday, April 27, 2013

Using the resources provided for us!

This past week my Director looked up at the mobiles made from tree branches with Ellison die cardinals in them (that are hanging from the children's room lights) and asked what I was going to put up there for summer. This was a fair question considering those branches have been up there since the first weekend of December. I have to say though, I have never received so many compliments on any idea before. And it was so simple.  Naked branches with a red cardinal in each...the perfect winter decor. I thought about adding spring blossoms to them with tissue paper, but I was so busy with decor for Summer Reading Program workshop that it just didn't happen.

So anyways...back to the question...what was going to replace the cardinals? I hadn't considered it at all.  The Dig Into Reading theme is all about underground and when you are hanging things up, well...how do you hang up the underground?  And then it came to me, hang up "slices" of the underground with underground dwelling animals in them. At first I thought I would just use brown posterboard, cut out tunnels and laminate the creatures inside....but I don't have a laminator that is big enough. Then I looked at this year's poster. It showed underground burrows with yellow backgrounds. I could cut out burrows and glue yellow posterboard over the openings.

The best thing of all though, is that I could use Scott Nash's wonderful illustrations that were mine to use as they came on my SRP cd-rom. I enlarged them to the size I wanted and also copied and pasted to a second page which I then flipped horizontally...this way I could hang them up and they would be double-sided.

I cut out the brown posterboard first, traced the cut out part over the yellow posterboard, cut the yellow posterboard out with about 1/2" overhang and glued the yellow posterboard over the opening on the brown posterboard. I used clear tacky glue and put it on the floor of the storytime room with heavy encyclopedias on it to keep it from warping.  I cut out the Scott Nash characters (in color!) and when the posterboard was dry, I glue-sticked them to the inside of the burrows. I used my thin sharpie marker to make the details that had been cut off...the mouses tail and whiskers, the porcupine's quills, the hatch-mark shadowing.

 I used markers to add the detail to the layers of dirt, and I cut the bottom of the brown posterboard so it wasn't perfectly straight.  To hang them up I will use punch a couple holes through the top and hang it with monofilament.  So that's it, my easy idea. I let Scott Nash do all the artwork and all I had to do was cut and past. And a little shadowing.


Tuesday, March 12, 2013

Puppy Storytime

Last night we had a puppy storytime at the library. I haven't ordered "Charley's First Night" by Amy Hest with adorable illustrations by Helen Oxenbury, or I would have definitely used it.

 The books I included were "Some Dog" by Mary Casanova,


 "Good Boy Fergus" by David Shannon,


 and "Little Dog Lost: the True Story of a Brave Dog Named Baltic" by Monica Carnesi


I have done quite a few dog storytimes, and I needed a new craft. After looking online for a dog front and back template, I thought to myself..."I am capable of drawing something better than that."  I drew my pup front and back and made copies of it on cardstock. My storytime kids are pretty young, so I cut the shapes out myself, leaving the coloring, folding and gluing up to them. Each dog will need a strip of paper (approximately 2" x11.5)  This will be accordion folded and glued to the front and back of the dog. Please glue the folds so they face sideways and not up and down. If you glue up and down, the dog will sit down, and I think the kids would prefer that they stand.  I wish I had thought to take pictures of the finished dogs that were every color of the rainbow. 

Here is my sample: 


And here is the template. Feel free to use it.

Sunday, February 24, 2013

Lilly and I share an appreciation for 1960s fashion, especially dresses from the mod era.  Anything that Twiggy would wear. And most especially an appreciation for Yves St. Laurent's 1965 Mondrian dress.  I decided I would try to make a version of this iconic dress, using a vintage pattern.  I found Vogue 4304 at an estate sale, and decided that, with some modification, this pattern could provide the basic outline of the dress.  I modified that pattern by removing all darts. I also used a finished Vogue Paris Original 1715 dress (designed by Patou) to give me some guidelines as to where the dress would be divided into rectangles.

    It was no trouble to find a nice solid knit at Joann Fabrics, however, I couldn't find a blue (too royal!), or a yellow (too orange!) that would suit. I ended up purchasing a blue polo shirt and a yellow polo shirt that were closer to the original colors at a thrift store. They were very inexpensive and I didn't feel wasteful cutting them up for fabric.


  I also bought a lighter white knit to be used as lining for each piece. I felt that if I didn't use lining, all my careful cutting would pull and stretch. One of the reasons this dress took so long was that I hand basted each piece of lining on to the dress fabric. I was being meticulous, but now that I'm done, I'm happy with the results. And here they are!